Vector art is required to create designs out of glitter. This can be obtained by designing your artwork in programs like Corel Draw or Adobe Illustrator. Images can also be purchased from websites such as Shutterstock. We can also convert raster images into vector images for $30.00. Photographic images do not work with glitter vinyl.
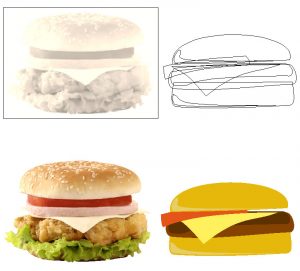
See the images below. The images on the left are raster images, the images on the right are vector. The images at the top are how an image looks in wire frame mode. In these images, anywhere you see a black line the cutter will cut. The image in the upper left will cut a box around the image, while the image on the right will cut each area out. This normally would be ungrouped and only part of each image would be cut in a different color. We left them stacked simply to show you what vector art looks like.
Once we have vector art, we send it to a vinyl cutter to cut out the image. The excess material is removed during a process referred to as “weeding.” The remaining material is heat pressed onto the garment, one layer at a time.
Notes about glitter vinyl:
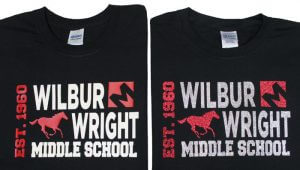
– Unlike regular vinyl, glitter vinyl cannot be layered on top of itself on a garment; however, to achieve a multi-colored design, it can be placed next to another color. Having gaps between colors makes this a bit easier. Below is an image of a two-color design in both regular and glitter vinyl.
– Because of its thickness, glitter vinyl should not be cut into extremely narrow pieces. We recommend at least a 4-point line. Extreme detail should be avoided. While both images below are of vector art, only the one on the left would be ideal to cut with vinyl.
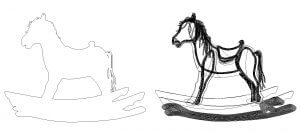
Left: Easy to cut in vinyl; Right: Practically impossible to cut in vinyl
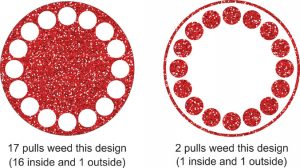
– Glitter vinyl is more expensive than regular vinyl. To help keep costs down, it is recommended designs be created to have as little weeding as possible. See example below.
For more information, see our services pages on vinyl.
